Pages

Sunday, February 20, 2011

Cheese Danish


I know, it's not some magnificent cheese that we can barely pronounce that I'm writing about today. But it is Sunday morning and I think Sunday mornings are all about a good cup of hot coffee and a warm sweet treat to go with it. When I asked my husband what he might like for a lazy Sunday morning, he replied, "Cheese Danish." So off I went in to the land of Google and came across Ina Garten's Easy Cheese Danish recipe. The recipe makes 8 flaky and delicious cheese danish. Put them on a plate and watch them disappear. It'll be the best magic trick you've performed since grade school!

Ingredients
* 8 ounces cream cheese, at room temperature
* 1/3 cup sugar
* 2 extra-large egg yolks, at room temperature
* 2 tablespoons ricotta cheese
* 1 teaspoon pure vanilla extract
* 1/4 teaspoon kosher salt
* 1 tablespoon grated lemon zest (2 lemons)
* 2 sheets (1 box) frozen puff pastry, defrosted
* 1 egg beaten with 1 tablespoon water, for egg wash

Directions

Preheat the oven to 400 degrees F. Line a sheet pan with parchment paper.

Place the cream cheese and sugar in the bowl of an electric mixer fitted with a paddle attachment and cream them together on low speed until smooth. With the mixer still on low, add the egg yolks, ricotta, vanilla, salt, and lemon zest and mix until just combined. Don't whip!

Unfold 1 sheet of puff pastry onto a lightly floured board and roll it slightly with a floured rolling pin until it's a 10 by 10-inch square. Cut the sheet into quarters with a sharp knife. Place a heaping tablespoon of cheese filling into the middle of each of the 4 squares. Brush the border of each pastry with egg wash and fold 2 opposite corners to the center, brushing and overlapping the corners of each pastry so they firmly stick together. Brush the top of the pastries with egg wash. Place the pastries on the prepared sheet pan. Repeat with the second sheet of puff pastry and refrigerate the filled Danish for 15 minutes.

Bake the pastries for about 20 minutes, rotating the pan once during baking, until puffed and brown. Serve warm.

Monday, February 14, 2011

Gorgonzola Cheesecake


I've been wanting to try this Gorgonzola cheese cheesecake since I discovered it in The Great Big Cheese Cookbook last summer. Here's the catch though: I knew I would be going completely over the handle bars if I made the 8 inch size. So this weekend I drove to Kitchen Kapers and purchased a mini springform pan (4.5 inches) for $7.50. I cut the recipe in half and I now have a lovely little cheesecake that will store nicely in the refrigerator for the duration of the week. I'll put a slice on a toasted bagel in the morning. I'll sneak a slice or two before dinner. Hey, maybe I'll give myself a facial with it! And can I just rave about how good a slice goes with a grilled steak? My husband was in heaven tonight when I put a slice next to his grilled flank steak. This cheese cake is so versatile and so easy to throw together. I loved the extra little crunch of the toasted walnuts and the addition of honey gives it a very subtle sweetness. This cheesecake is so sinfully good that I'll probably have to get down and do 100 Hail Marys by the time I finish it off. But it was worth every delicious bite...


2 (8oz) packages cream cheese, at room temperature
2 cups crumbled Gorgonzola cheese, at room temperature
3 eggs, at room temperature
1/4 cup sour cream
2 Tablespoons clover or orange blossom honey
Pinch of kosher salt
Pinch of fresh cracked pepper
1/4 cup of toasted walnuts
1/2 cup caramel topping
red grapes and crackers to garnish

NOTE: if you want a smaller mini cheese cake, cut the recipe in half and bake it in a mini 4.5 inch springform pan

1. heat oven to 300F. Spray an 8 inch springform pan with cooking spray. Line the bottom with parchment paper and spray again.

2. In a large bowl beat the cream cheese until smooth. Measure out 1/4 cup of Gorgonzola and set aside. Add the remaining blue cheese to the mixing bowl. Add the eggs, one at a time, beating well after each addition. Scrape mixture off the side of the bowl. Add the sour cream, honey, salt and pepper. Beat until combined. Pour in to the pan.

3. Place a shallow pan of water on the bottom rack in the oven and place the cheesecake on the rack above it. Steam from the water will help prevent cracks in the cheesecake. Bake 40 minutes.

4. Remove the cheesecake from the oven. Sprinkle the reserved blue cheese and walnuts over the top of the cheesecake and bake 10 to 15 minutes more, until lightly browned. Cool in the pan to room temperature.

5. To serve, cut the cheesecake into wedges. Drizzle each plate with caramel sauce. Place the wedge on the plate. Garnish with grapes and crackers.

Sunday, February 13, 2011

Yukon Gold potato and Manchego cheese tart


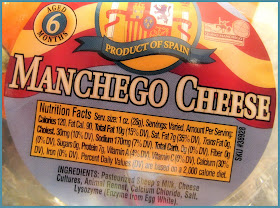
I'm not really sure why this recipe is called a "tart." It's more like a slightly crispy version of Potatoes Au Gratin. All I can tell you is that it's simple to make and delicious to boot. I love the buttery and smooth flavor of the Yukon Gold and the Manchego is a perfect compliment to this dish; not too strong, not too mild. Even my daughter asked for more last night when she finished her first plateful. I think I've got a junior cheese junkie in the making. As is very often the case, I found a nice chunk of Manchego at my local Trader Joe's for less than $5 which covered the amount needed for the recipe and some left over. Manchego melts very nicely. It's a wonderful choice to add to quesadillas, potatoes dishes and omelets.

Let me give you a little background on Manchego:

Manchego (officially Queso Manchego) is a cheese made in the La Mancha region of Spain from the milk of sheep of the Manchega breed, which is aged for between 60 days and two years. Consider this cheese "The Don Quixote cheese."

Manchego has a firm and compact consistency and a buttery texture, and often contains small, unevenly-distributed air pockets. The colour of the cheese varies from white to ivory-yellow, and the inedible rind from yellow to brownish beige. The cheese has a distinctive flavour, well developed but not too strong, creamy with a slight piquancy, and leaves an aftertaste that is characteristic of sheep’s milk.

RECIPE:

* 1 tbsp olive oil
* 6 Yukon Gold potatoes
* 1 tbsp chopped parsley or oregano
* 2 cloves garlic, thinly sliced
* 1/2 cup freshly grated manchego cheese
* salt to taste
* freshly ground black pepper

1. Preheat the oven to 400°F.
2. Heat the olive oil in an ovenproof non-stick skillet over medium heat.
3. Peel the potatoes and cut them into very thin slices.
4. Layer half of the potatoes in overlapping slices to cover the bottom of the pan.
5. Sprinkle with the oregano or parsley, garlic, manchego cheese, salt and pepper (be careful not to sprinkle the cheese on the side of the pan, or it may stick).
6. Add the remaining potatoes in overlapping slices and sprinkle with salt and pepper.
7. Cover the skillet with foil and place it in the oven and cook until the potatoes are tender, about 15 minutes.
8. Remove the skillet from the oven, remove the foil,carefully loosen the edges of the potatoes and turn the tart onto a plate or platter. (NOTE: at this point I sprinkled some parmesan cheese on top and put it under the broiler for a few minutes until brown and crispy.)
9. Cut the tart into wedges and serve.

Thursday, February 3, 2011

Cotija Cheese

A few days ago at Trader Joe's I found a nice slab of Cotija (Ko-Tee-Ha)cheese.

This is a Mexican cheese that is semi-hard and crumbles like Feta. It's flavor is somewhere between Feta and Parmesan. Slightly salty but not overpowering, it works nicely as a topping on tacos, enchiladas, salads and pasta.


I needed to make a quick meal for myself tonight so I boiled up some Linguine and tossed it with olive oil, garlic, baby spinach and fresh tomatoes. The grand finale was a little mountain of crumbled Cotija cheese. Perfect and satisfying!